
Repairing an expandable garden hose is often a cost-effective alternative to replacing it, and with the right tools and techniques, you can extend its lifespan significantly.
In this guide, we’ll walk you through the steps to diagnose and repair common problems with an expandable garden hose, ensuring it remains functional for your watering needs. Let’s jump in.
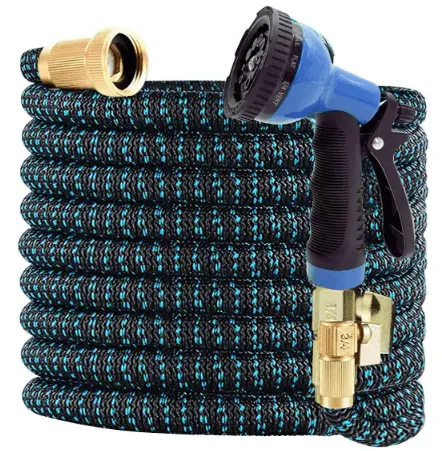
How to Repair Expandable Garden Hose
Tools and Materials Needed:
To repair an expandable garden hose, gather the following items:
- Scissors or a utility knife
- Waterproof repair tape or rubber patch kit
- Replacement connectors (if needed)
- Screwdriver (for removing connectors)
- Hose repair coupling (optional)
- Sandpaper (fine grit)
- Waterproof adhesive or sealant
- Clean cloth
- Bucket of water (for testing)
Step 1: Diagnose the Problem
Begin by identifying the issue with your hose. Fill the hose with water by connecting it to a faucet and turning on the water. Observe where leaks or sprays occur. Common problems include:
- Small punctures or tears in the inner tube or outer sleeve.
- Leaks at the connectors due to loose fittings or damaged seals.
- Cracks or breaks in the plastic or metal connectors.
- Kinks or twists that prevent proper expansion.
Mark the damaged areas with a piece of tape or a marker for easy reference during repairs.
Step 2: Drain and Dry the Hose
Turn off the water supply and drain the hose completely. Shake out any remaining water and let it dry to ensure a clean surface for repairs. A dry hose is easier to work with, especially when applying patches or adhesives.
Step 3: Repair Small Punctures or Tears
For small holes or tears in the inner tube or outer sleeve:
- Locate the damage: If the outer sleeve is torn, gently stretch the hose to expose the inner tube and check for damage there as well.
- Clean the area: Wipe the damaged spot with a clean cloth to remove dirt or debris. For better adhesion, lightly sand the area around the hole with fine-grit sandpaper.
- Apply a patch: Use a rubber patch kit or waterproof repair tape. Cut a piece of tape or patch slightly larger than the hole. If using a patch kit, apply the provided adhesive and press the patch firmly over the hole, ensuring no air bubbles remain. If using tape, wrap it tightly around the hose, overlapping the edges to create a watertight seal.
- Test the repair: Reconnect the hose to the faucet and turn on the water to check if the patch holds. If leaks persist, apply additional tape or a second patch.
Step 4: Fix Leaks at the Connectors
If the leak is at the connector:
- Inspect the connector: Check for cracks, loose fittings, or worn-out rubber washers. Tighten any loose screws or fittings with a screwdriver.
- Replace the washer: If the washer inside the connector is damaged, remove it and replace it with a new one of the same size. These are available at hardware stores.
- Seal with tape: For minor leaks around the connector, wrap waterproof repair tape around the base where the hose meets the connector. Ensure the tape overlaps for a secure seal.
- Replace damaged connectors: If the connector is cracked or broken, cut off the damaged end of the hose with scissors or a utility knife. Purchase a replacement connector compatible with your hose’s diameter. Attach the new connector by following the manufacturer’s instructions, usually involving screwing or clamping it onto the hose.
Step 5: Address Kinks or Twists
Kinks can weaken the hose over time. To fix them:
- Straighten the hose: Lay the hose flat and gently untwist any kinks.
- Reinforce the area: If the kinked section is damaged, apply waterproof tape or a patch to strengthen it.
- Prevent future kinks: Store the hose loosely coiled or flat to avoid twisting.
Step 6: Test the Repaired Hose
After completing repairs, reconnect the hose to the faucet and turn on the water. Check for leaks, proper expansion, and water flow. If the hose functions correctly, your repair is successful. If issues persist, revisit the problem area and reinforce the repair or consider replacing the hose if damage is extensive.
Related How to Glue a Lawn Mower Seat Back On(Step by Step)
Tips for Preventing Future Damage
To prolong the life of your expandable garden hose:
- Avoid over-pressurizing: Use the recommended water pressure (usually 40–60 PSI) to prevent stretching the inner tube beyond its capacity.
- Store properly: Drain the hose after each use and store it in a cool, dry place away from direct sunlight to prevent material degradation.
- Use a nozzle: Attach a spray nozzle to control water flow and reduce stress on the hose.
- Inspect regularly: Check for wear and tear periodically to catch issues early.
Related How Often To Sharpen Mower Blades(Sharpening Tips + Tools)
When to Replace Instead of Repair
If the hose has multiple large tears, extensive damage to the inner tube, or repeated connector failures, it may be more cost-effective to replace it. Expandable hoses are relatively affordable, and a new one might save time if repairs are frequent.
Related How to Release Hydros on Scag Mower(In 5 Steps)
Final words
Repairing an expandable garden hose is a straightforward process that can save you money and extend the life of your gardening tool. By diagnosing the issue, using the right materials, and following proper repair techniques, you can restore your hose to full functionality.
Regular maintenance and careful use will help prevent future damage, ensuring your hose remains a reliable part of your gardening routine. With these steps, you’ll be back to watering your plants or cleaning your patio in no time!