
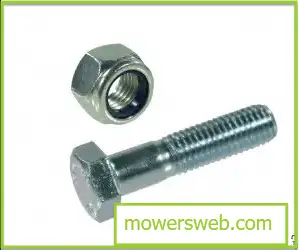
The power take-off (PTO) clutch bolt is a critical component in various machinery and equipment, including tractors, lawnmowers, and other agricultural or industrial machines.
Removing the PTO clutch bolt may be necessary for maintenance, repair, or replacement purposes.
In this comprehensive guide, we will walk you through the step-by-step process of removing a PTO clutch bolt, ensuring a smooth and successful operation.
Let’s jump in.
How to Remove PTO Clutch Bolt
Step 1: Prepare the Work Area
- Park the machinery on a level surface and engage the parking brake.
- Place blocks or wheel chocks behind the wheels for added stability.
- Ensure there is ample working space around the PTO clutch assembly.
Step 2: Disconnect Power Source
- Turn off the equipment and allow the engine to cool down.
- Disconnect the spark plug wire to prevent accidental engine starts.
Step 3: Remove the PTO Shield or Cover
- Locate the PTO shield or cover that protects the PTO clutch assembly.
- Remove the screws or bolts securing the shield or cover using a screwdriver or appropriate socket.
Step 4: Secure the PTO Clutch
- Identify the PTO clutch assembly and locate the securing bolt.
- Use a pry bar or similar tool to secure the PTO clutch and prevent it from rotating.
Step 5: Loosen the PTO Clutch Bolt
- Select the correct socket size and attach it to the ratchet or impact wrench.
- Position the socket onto the PTO clutch bolt and turn it counterclockwise to loosen it.
- Apply steady and even pressure while loosening the bolt.
Step 6: Remove the PTO Clutch Bolt
- Once the PTO clutch bolt has loosened, keep turning it counterclockwise until it is easy to remove by hand.
- Carefully slide the PTO clutch bolt out of its position, ensuring not to damage any surrounding components.
- Set the bolt aside in a safe place for later inspection or replacement.
Read Low Oil Symptoms in Lawn Mowers (Don’t Ignore These Signs)
Troubleshooting Tips For PTO Clutch
- If the PTO clutch bolt is stuck or difficult to loosen, apply a penetrating oil or rust dissolver to help break up any rust or corrosion.
- Tap the bolt lightly with a rubber mallet or use a small hammer and a wooden block to create gentle vibrations that can help loosen it.
- If all else fails, consult the equipment’s user manual or seek professional assistance to avoid causing further damage.
PTO Clutch Removal Tool
A power take-off (PTO) clutch removal tool is a specialized device used to disengage and remove the PTO clutch assembly from a machine or vehicle.
The PTO clutch is responsible for transferring power from the engine to various attachments, such as mowers, snow blowers, or other implements.
The removal tool is designed to make the process of disassembling the PTO clutch easier and more efficient.
It typically consists of components such as bolts, wrenches, and plates that are specifically designed to fit the PTO clutch assembly’s configuration.
- Bolts and Fasteners: Various bolts and fasteners are designed to secure and stabilize the clutch assembly during removal.
- Wrenches: Different types of wrenches, such as socket wrenches or open-end wrenches, are used for loosening and tightening specific components of the clutch.
- Puller Tool: A specialized puller tool that helps to safely separate the clutch assembly from the engine’s output shaft.
- Alignment Tools: Tools designed to ensure proper alignment when reinstalling the clutch assembly, preventing misalignment issues
- Bearing Separator: A tool used to separate bearings and other components that might be attached to the clutch assembly.
- Locking Plate: A plate used to lock the clutch in place during removal, providing a stable base for the removal process.
- Installation Tools: Tools that aid in the proper installation of the new or reassembled clutch, ensuring a secure fit
- Safety Gear: Depending on the complexity of the job, safety gear such as gloves, safety glasses, and protective clothing might also be recommended.
- Instruction Manual: A detailed instruction manual that provides step-by-step guidance on how to use the removal tool effectively and safely.
- Carrying Case: A sturdy carrying case to store and organize all the components of the removal kit for easy transportation and storage.
Read Will a Bad PTO Clutch Cause Power Loss?(Explained)
Clutch Head Screw Removal
Removing clutch head screws can sometimes be challenging due to their unique design. Clutch-head screws have a specialized head with a recessed center and two small pins, requiring a specific tool to remove them.
Follow these steps to remove the clutch head screws:
Tools Needed:
- Clutch head screwdriver or clutch head screw removal tool
- Pliers (optional)
- Safety glasses
Steps:
- Prepare the Area: Ensure you’re working in a well-lit and well-ventilated space. Put on safety glasses to protect your eyes from any debris.
- Choose the Right Tool: Obtain a clutch head screwdriver or a clutch head screw removal tool that matches the size of the clutch head screw you intend to remove. These tools have a unique shape that fits into the recessed center of the screw head.
- Position the Tool: Insert the clutch head screwdriver or removal tool into the recessed center of the clutch head screw. Make sure the tool’s pins align with the pins on the screw head.
- Apply Steady Pressure: Hold the tool firmly and apply downward pressure to engage the pins of the tool with the pins on the screw head. Make sure the tool is seated securely in the screw head to prevent slipping.
- Turn counterclockwise: While maintaining pressure on the tool, turn it counterclockwise (left) to loosen the clutch head screw. Clutch-head screws are designed to resist tampering, so you might encounter resistance initially.
- Use Pliers (If Necessary): If the clutch head screw is particularly tight or stubborn, you can use pliers to grip the shaft of the screwdriver tool for added torque while turning. Make sure you grip it securely to avoid slipping and damaging the screw head.
- Continue Turning: Keep turning counterclockwise until the clutch head screw is fully loosened and can be removed from its position.
- Inspect and Replace: Once the screw is removed, inspect it for any signs of wear or damage. If necessary, replace it with a new clutch head screw.
Read Toro TimeCutter Valve Adjustment(In 5 Quick Steps)
Final Remarks
Removing a PTO clutch bolt may seem like a daunting task, but by following the step-by-step guide and taking the necessary precautions, you can successfully complete the process.
Remember to prioritize safety and consult the equipment’s user manual for specific instructions or warnings.
Regular maintenance of the PTO clutch bolt will help ensure the smooth operation of your machinery and equipment.
Read What size mower for 10 acres?(Tips for Perfect Size)
FAQs
Can I remove the PTO clutch bolt without any prior experience?
Removing the PTO clutch bolt requires some mechanical knowledge and experience working with machinery.
If you are unfamiliar with the process, it is recommended to consult the equipment’s user manual or seek professional assistance to avoid any potential damage.
How do I know if the PTO clutch bolt needs to be removed?
The need to remove the PTO clutch bolt may arise for various reasons, such as maintenance, repair, or replacement.
If you experience issues with the power transfer or suspect a problem with the PTO clutch assembly,
it might be necessary to remove the bolt for further inspection or troubleshooting.
What safety precautions should I take before attempting to remove the PTO clutch bolt?
Prioritize safety by wearing safety goggles and gloves to protect yourself from any potential hazards.
Make sure the equipment is turned off, the engine is cool, and the power source is disconnected.
Additionally, read the equipment’s user manual for specific safety instructions and warnings.
What tools and equipment do I need to remove the PTO clutch bolt?
To remove the PTO clutch bolt, you will typically need a socket set with various sizes, a ratchet or impact wrench, a torque wrench, a screwdriver, a pry bar, safety goggles, and gloves.
However, the specific tools required may vary depending on the equipment and its manufacturer’s recommendations.
How can I loosen a stubborn or stuck PTO clutch bolt?
If the PTO clutch bolt is stuck or difficult to loosen, you can try applying a penetrating oil or rust dissolver to help break up any rust or corrosion.
Additionally, gently tapping the bolt with a rubber mallet or using a small hammer and a wooden block to create vibrations can assist in loosening it.
If you encounter persistent difficulties, it is advisable to consult the equipment’s user manual or seek professional assistance.
Can I reuse the PTO clutch bolt after removal?
It is generally recommended to inspect the PTO clutch bolt after removal. Check for any signs of wear, damage, or deformation.
If the bolt appears to be in good condition, it can be reused.
However, if there are any concerns about its integrity, it is advisable to replace it with a new one.
Are there any specific torque specifications for reinstalling the PTO clutch bolt?
Yes, when reinstalling the PTO clutch bolt, it is crucial to follow the manufacturer’s specifications for torque.
Using a torque wrench, apply the recommended amount of torque to ensure proper tightening.
Refer to the equipment’s user manual or contact the manufacturer for the specific torque values.
What should I do if I encounter difficulties or have questions during the process?
If you encounter difficulties or have any questions while removing the PTO clutch bolt,
refer to the equipment’s user manual for troubleshooting guidance or reach out to the manufacturer’s customer support for assistance.
They can provide specific advice tailored to your equipment and situation.